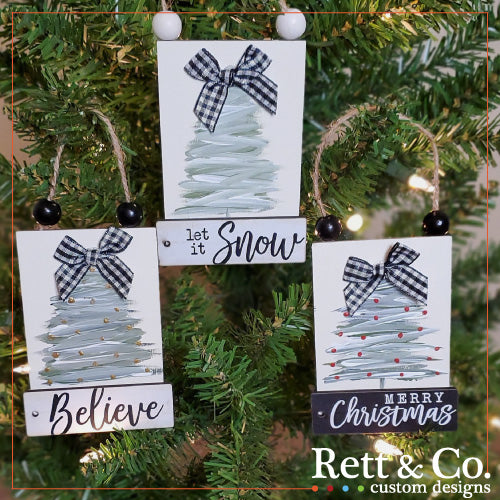
Paint Trees

DIY paint trees are the perfect project to create one of a kind ornaments or shelf sitters for the holiday season!
Supply List:
- Paint in black, green and white. Additional colors like red and gold can be used for adornments.
- Wood flats (ours are approximately 2.75" x 4.25)
- Mini buffalo check ribbons
- Saying bar for bottom
- Jute twine or ribbon for hanging
- Assorted accent beads
- Paint brush
- Hot glue gun
Follow along in our quick video tutorial!
If videos aren’t your thing, please read on for a quick overview of our paint tree project.
To start, paint your wood flats with a base color. We chose a neutral cream. Once your base coat is dry, figure out where you want to place your bottom bar and buffalo check ribbon. You want to be sure your paint tree stays in between these two items or your finished project may look a little crowded.
Now it’s time to paint! Start with black paint and gently go back and forth making horizontal lines in the outline of a tree. Stay narrow at the top and gradually get wider at the bottom. Next, do the same with green. After your green looks the way you want it, go over your tree with white paint. The trees are supposed to be semi textured so don’t worry about using too much paint. When I am done with my first application of white, I normally do another layer of green and finish with another layer of white to give it a definite textured look. Do what looks good to you!

Line painting is very forgiving. If at any point you feel like you messed up your tree, smudge it all and start over. On top of the smudged tree add another layer of hard green lines and then hard white lines and lightly blend by using a horizontal sweeping motion. It will work itself out, I promise! Paint trees always remind me of Bob Ross and his happy little trees. They really are light and fun and can always be rescued.
Once your tree is how you like it, you can leave as is or add a few colorful accents. I painted up three trees and left one plain, gave one gold accents and the other red accents to give you an idea of what they can look like. All three turned out beautifully.
Hot glue on your mini buffalo check ribbon and bottom saying bar. We got our bottom bars at Walmart in the holiday section. If you haven't been lately, they have adorable mini ornaments that make great additions to craft projects.

The last step is a quick little hanger. We wanted our ornaments to stay rustic so we chose jute twine with a couple of accent beads for the project. Using approximately 8 inches of jute twine, tie a knot on one end, thread on two beads and then tie off the last end. When hot gluing the twine down, leave the bead on top of the wood flat. The bead will help the ornament hang straight and flush on your tree. Other ideas for a hanger include fully beaded twine, ribbon or bent wired greenery.
So what do you think, will you make a few? Follow us on social media and tag any pictures of your creations with #rettandco. We'd love to see your finished project!. ~Rett & Co
