Terra Cotta Accent Bowl

I’ve been looking for a round dough bowl for quite some time. When I find a bowl I like, I can’t commit because the prices are insane! It finally occurred to me I could use a terra cotta saucer and make one for about one third of the price trendy dough bowls start at. If you are looking for the same type of accent holder, follow along as we turn a regular terra cotta saucer into a gorgeous accent holder.

For this example, I used a 14 inch terra cotta saucer. You can use any size that works for you, I would suggest somewhere between 10 and 16 inches. Smaller terra cotta saucers are great for holding jewelry, collecting keys, or displaying candles but not so much for showcasing home décor. You can grab terra cotta saucers at any home improvement store or even online at Amazon. I picked up my saucer at Menards for approximately $12.00.
Raw terra cotta saucers are typically pretty dusty until sealed. Before starting the project, you will want to rinse your saucer out with cool water and let dry. After we paint, your saucer will be sealed with wax and no longer shed.

You will want to pick two colors of chalk paint for this project. I chose a darker undercoat and light top coat in neutral colors. I applied two coats of Java and let it dry for two hours. I then applied two coats of River Walk. As I was working through the project, I realized a navy blue undercoat or a dark green undercoat would look sharp, too!

When the chalk paint is completely dry, you can begin sanding. I started with an 80 grit and carefully worked my way down to the dark layer of paint along all edges and raised areas. I did choose to sand all the way down to the terra cotta in some sections to give character. You can sand as much or as little as you want. When your base sanding is done, go over the entire piece with a fine grit paper to smooth any rough spots. Last but not least, wipe off all paint dust with a damp towel.
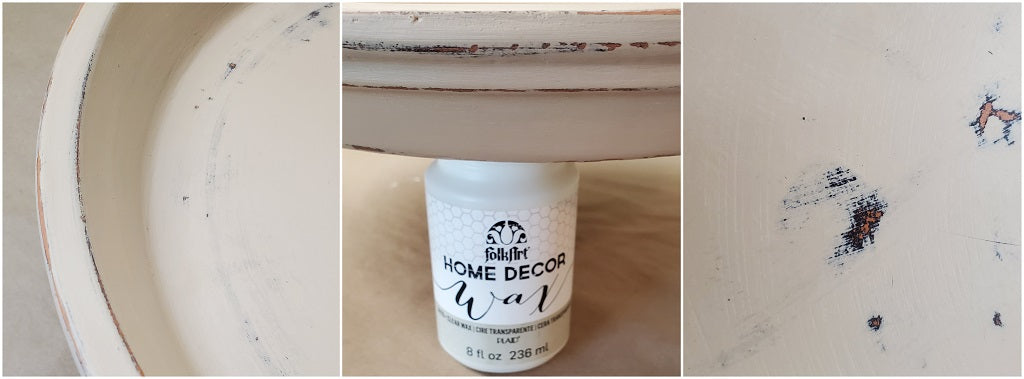
To seal the project, I used a clear wax. You can apply the wax with a wax brush or with a lint free cloth. I chose a lint free cloth for this project and the wax went on beautifully. Rub your wax in until you have achieved the sheen you like. It’s amazing how the colors start to pop once the wax hits them! Any time I wax something, I let the project sit for a full 24 hours before using. It may be overkill but I have never had a sticky project or fingerprints show up later, therefore, I’ll stick to what works and not jinx myself. If you will be using your saucer outside where it may become wet with standing water, you will want to use a polyacrylic sealer instead of the wax. Wax is water resistant but not waterproof.

We loved this project so much we are going to grab an oval terra cotta saucer next time we are out and about. A red or green undercoat popping through a top coat of beige would be a great addition to our holiday hearth. We hope you enjoyed this project as much as we did! ~ Rett & Co.